.jpg)
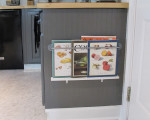
For today, I wanted to share a project that does double duty for me. The electrical panel for our house is smack in the middle of the only wall in my kitchen. It’s an eye-sore to say the least and it’s been a thorn in my side since we’ve been in this house. #designfail -for sure! So, I’ve been trying different ways to hide/camouflage it for years. It’s huge and everything I’ve tried so far ends up just being a bigger problem. See what I mean . . . . I primed and painted it when I painted the kitchen to help it fade into the wall. It did help, but it’s still there.
.jpg)
I didn’t want a huge, heavy, cork board or anything that was bigger than the dimensions of the panel but I couldn’t find anything close. SO, I figured out that if I put together 2, pre-made streched canvases they matched exactly! Yipee!
Tools List:
- Upholstery Nails
- Stretched Canvas
- craft wood strips (I used stir sticks and smaller pieces)
- Acrylic felt fabric
- Upholstery fabric
- Fabric marking pen
- Staple gun


Start by lining up the canvases and use the stir sticks/craft wood to brace at each joint. Stir sticks are the perfect width for the canvas frames. Smooth out the felt fabric and center your canvas frames on top. Trim around the edges and leave a wide margin (about 5 inches) to fold over all edges.


Cut and trim the corners to make the edges smoother. Fold them over and staple in place. I used clear tape to hold the extra pieces in place while I put the put the upholstery fabric in place. Use the same technique for covering with the upholstering fabric that you used with the felt. I found that giving a wide margin for folding over helped make the overall pin board smoother. When the top fabric is stapled in place use a large ruler and erasable fabric marker to layout where the upholstery tacks will go.


Measure the sides and top of your board to find the middle of each. You’ll want to place the tacks around 2-3 inches apart. HINT: You can visualize the finished piece by place the tacks upside down around the board. Start by marking the corners (about an inch from the edge) and work your way to the middle in even increments.


I used small hooks attached to the top of the panel to attach the pin board to be easy to remove if we need to use the electrical panel. And I use map pins to tack up pictures and postcards.

Linking up at Wow Us Wednesday, The Scoop, Met Monday, & Remodelaholic


Jennifer (White Tulip Designs)
[…] Kitchen Pin Board […]
Canvai, definitely! Thanks for stopping by!
Nice cover up! This looks so good and if it fits perfectly…even better. I love canvases…canvai?…just canvas? Anyway, They make good projects for a lot of ideas.
Thanks for linking up this week at #HomeMattersParty
[…] Water Bottle Holder at My Love 2 Create / Pottery Barn Inspired Filing Cabinet at The Roane Home / Custom Kitchen Pinboard at White Tulip Designs […]
[…] How to Clean and Organize the Garage at Clean & Scentsible / DIY Hook Rack at Greco Design Company / DIY Water Bottle Holder at My Love 2 Create / Pottery Barn Inspired Filing Cabinet at The Roane Home / Custom Kitchen Pinboard at White Tulip Designs / […]
[…] Water Bottle Holder at My Love 2 Create / Pottery Barn Inspired Filing Cabinet at The Roane Home / Custom Kitchen Pinboard at White Tulip Designs […]