I do not profess to be much of a seamstress but I sure do fake it ok. And, as luck would have it, Hubbs got me a new machine this year. Which also means I’ve temporarily converted our dining room into a sewing room. (Shhh, don’t tell.) I’ve been scouring my how-to books, Pinterest, and the rest of the internet for projects so I can play with my new toy.
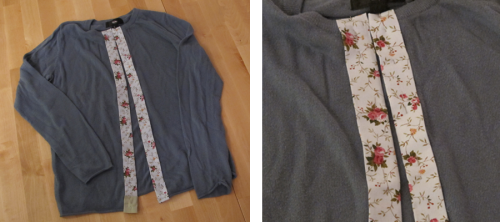
A while back I pinned an adorable project from Sew Caroline that I’ve really wanted to try. I’ve needed a little update to a sweater that was starting to look a bit sad and was headed to the donation bin. I’m thinking this will come in handy through the spring! I made a few changes to her tutorial and my flowers are different. You can see I decided to forgo the loop and button to leave it open.

The edging fabric makes it a bit more feminine than it originally did. I tried my hand at the rosettes she used in her tutorial but mine were not nearly as pretty and looked bit too heavy. I also used a felt backing to sew the rosettes directly to the sweater rather than pin them on. It should still be fairly easy to hand-wash and spot clean.
After smoothing out the sweater and cutting a straight line down the middle of the front, I started by ironing strips of 4 inch wide fabric folded in on both sides (in a “V” shape) with the raw edges on the inside. Then I pinned the strips onto either side of the opening and tucked in the raw edges at the top and bottom. I also added a plain, detail piece at the bottom on the left. I just felt like it needed it.

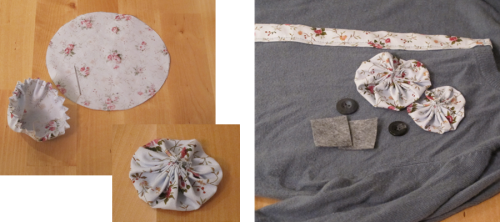
The rosettes I made were 2 circles in varying sizes (one was 4 and the other 6 inches). Then I sewed a running stitch about 1/4 inch from the edge all around the outside. Then pull it tight, making sort of a balloon shape and secure it there. Then, I mashed it down into a circle.

Using felt pieces to stabilize I secured the flowers in place them finished the centers with a button.
It really dresses up a t-shirt right? I love it!!

Come see the original tutorial over at Sew Caroline!


Jennifer (White Tulip Designs)